
Tricky Story: Story 2 Level 60 Walkthroughs & Guide
Help Maddie find the tarot cards that reveal her destiny
Help Maddie find the tarot cards that reveal her destiny.
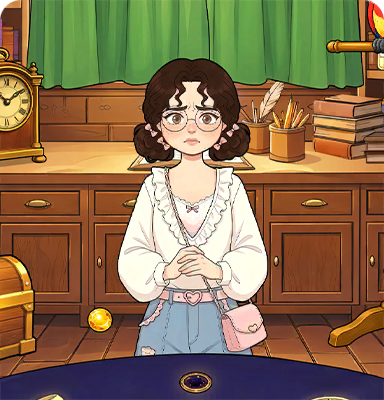
Tricky Story: Story 2 Level 60 — Help Maddie find the tarot cards that reveal her destiny Guide Overview
I needed a couple of tries before I noticed the green gem tucked under the parrot’s wing. This level leans hard into intuition and hidden signs – you’re guiding Maddie through a room that feels like a fortune-teller’s den, where every object whispers a clue. Gems, dolls, curtains, a clock – they all build toward a single moment of revelation. The dialogue hints at a fountain and a mysterious figure, so keep your eyes open. Here’s how I cracked it without chasing dead ends.
Pattern Overview
Tricky Story 2 Level 60’s hidden gems require patience, but the real trick is reading emotional cues.
The Emotional Sequence
- Parrot’s Wing Gem: Trusting a hidden clue before moving forward — in Tricky Story 2 Level 60, this initiates the search pattern.
- Yellow Gem on Shelf: Recognizing symmetry — the second gem confirms you’re on the right path.
- Chest Puzzle Gem: Overcoming a mechanical block to earn a reward — builds momentum toward the table.
- Rag Doll Selection: Choosing identity — curly brown hair links to a character Anna recognizes.
- Curtain Light: Revealing the spiritual presence — the strange light shifts the mood from mundane to mystical.
- Clock at Twelve: Setting destiny’s trigger — aligning the hands completes the ritual.
Why This Level Feels Tricky + The Key Insight
The first trap: the green gem is easy to miss because the parrot’s wing blends into the background. Second, the chest puzzle isn’t obvious – you might tap the chest and expect a simple open, but it’s a mini-game. Third, the rag dolls look identical at a glance, and picking the wrong one stalls progress.
The key insight hit me when I read Anna’s inner voice: “Trust your inner voice.” Tricky Story 2 Level 60 isn’t about random item hunting – it’s a guided journey where each step answers an emotional question Maddie hasn’t asked yet. The gems represent trust, the dolls represent identity, the light represents hope, and the clock represents timing. Once I saw that pattern, the order made perfect sense.
Step 1. Uncover the Green Gem
Look under the parrot’s wing for the green gem. Anna’s inner voice says, “Trust your inner voice, so my inner voice right now is…” Placing it on the table fills the first slot. This step in Tricky Story 2 Level 60 builds your confidence in searching hidden spots.
Step 2. Locate the Yellow Gem
Don’t rush past the shelf – the yellow gem sits on a dusty ledge. Drag it to the table’s matching hole. Now two gems illuminate the surface. Tricky Story 2 Level 60’s puzzle ramps up because the table starts to glow, hinting at a third gem.
Step 3. Solve the Chest Puzzle
Tap the chest to play a puzzle. Anna recalls, “This could be a description of the person I’m looking for.” Complete the mini-game to claim the red gem. Skip this and the table stays incomplete. In Tricky Story 2 Level 60, the chest puzzle is the core mechanical challenge.
Step 4. Select the Right Rag Doll
Three rag dolls sit on the shelf – choose the one with curly brown hair. “I can’t hear what he’s saying clearly…” Anna mutters. This selection ties to a character’s identity. Tricky Story 2 Level 60 uses dolls as emotional markers, and picking wrong locks you out of the next clue.
Step 5. Swipe the Curtains
At first, the window shows nothing. Swipe the curtains to reveal a strange light. Touching it triggers a dialogue: “Does it look familiar? It looks like the fountain in the square!” This light is the turning point in Tricky Story 2 Level 60, shifting the scene from objects to symbolism.
Step 6. Set the Clock to Midnight
The final step feels ceremonial. Touch the clock and drag the minute hand to exactly 12 o’clock. Anna thinks, “This could be a description of the person I’m looking for.” Setting the time aligns the stars. Tricky Story 2 Level 60 ends with a perfect circle – all pieces in place.
The Logic Behind It
Tricky Story 2 Level 60 is solved by treating each action as an emotional unlock: gather physical components (gems) to build trust, then select a representative (doll), reveal the spiritual (light), and finally trigger destiny with a precise time. The method follows Anna’s inner voice, not arbitrary order.
Final Scene Description
When I finished, the clock chimed. The three gems pulsed on the table, and the strange light merged with the rag doll’s curly hair. Maddie gasped – a tarot card flickered in the air, showing a fountain. I watched as her destiny unfolded, a moment Tricky Story 2 Level 60 built toward with every hidden gem and whispered clue. The room felt warm, finally still.